
Italian bees are a popular choice for beekeepers because of their advantages over Chinese bees: they are easier to manage, have larger colonies, and produce more honey. However, to successfully raise Italian bees, you need to master three essential skills: mite control, artificial queen rearing, and colony multiplication.
Table of Contents
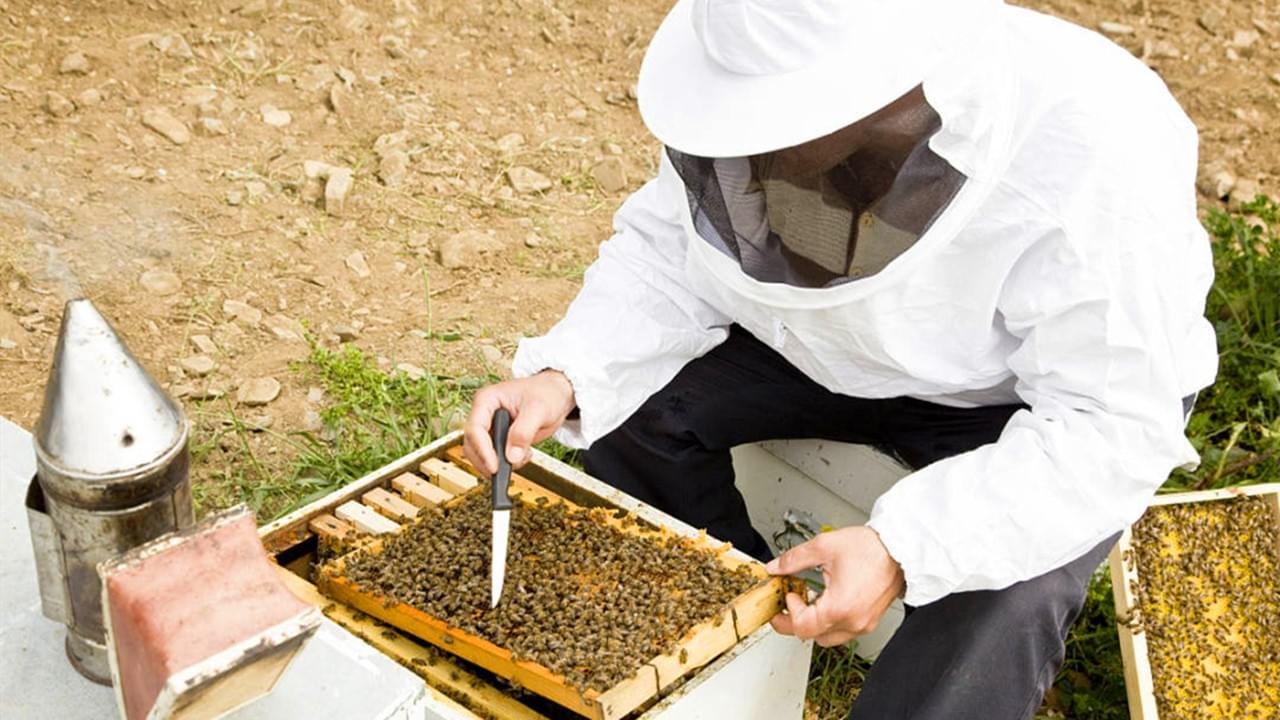
ToggleMite Control
One of the biggest challenges of keeping Italian bees is dealing with mites, especially the Varroa mite, which can cause serious damage to the colony. If you neglect the mite control work, your bees will become sick, weak, and unproductive. Not only will you lose the potential income from honey, but you will also have to spend a lot of time and effort on treating the mites.
To prevent this from happening, you need to do a thorough mite control before the colony multiplication stage. There are three key points to remember:
- Choose a good mite control product. There are many options available on the market, such as oxalic acid, formic acid, thymol, and synthetic acaricides. You should choose the one that suits your situation, experience, and preference. You can also consult other beekeepers or experts for advice.
- Do the mite control before the colony multiplication stage. Once the colony starts to grow and enter the production stage, it will be very difficult to do the mite control effectively. You should do it before the spring nectar flow, when the colony is still small and has less brood and honey.
- Do the mite control with empty combs. This means that you should remove the combs that have brood or honey from the hive and only leave the empty ones. This way, the mite control product can reach the mites more easily and kill them more thoroughly. This is why we use the queen excluder method to do the mite control.
By doing the mite control properly, you can ensure that your bees are healthy and strong, and ready for the next stage of colony multiplication and honey production.
Artificial Queen Rearing
Another important skill for keeping Italian bees is artificial queen rearing. This is the process of producing new queens artificially, instead of relying on the natural swarming or supersedure of the colony. By doing this, you can increase the number of colonies quickly and efficiently, and prepare for the honey flow season.
Artificial queen rearing has many benefits, such as:
- You can select the best queens from your own stock or from other sources, and improve the quality and performance of your colonies.
- You can control the timing and quantity of queen production, and plan your colony multiplication schedule accordingly.
- You can avoid the risk of losing swarms or having weak colonies due to natural queen loss or replacement.
To do artificial queen rearing, you need to follow these steps:
- Choose the right time for queen rearing. This depends on the nectar flow in your area, and the time you need to multiply your colonies. Generally, you should start queen rearing two months before the honey flow season, so that you have enough time to develop the new colonies.
- Make the queen cells. You can use various methods to make the queen cells, such as grafting, Miller method, Jenter system, or Nicot system. The basic principle is to transfer young larvae (less than 24 hours old) from the selected queen to the artificial cells, and place them in a queenless or queenright starter colony, where the worker bees will feed them royal jelly and draw out the cells.
- Transfer the larvae. This is the most delicate and skillful part of queen rearing, as you need to use a special tool (such as a grafting needle or a Chinese grafting tool) to carefully pick up the larvae from the donor comb and place them into the artificial cells, without damaging or drying them. You need to practice this skill until you can do it fast and accurately.
- Feed the starter colony. The starter colony is the one that accepts and nurtures the grafted larvae. It can be either queenless or queenright, depending on the method you use. In either case, you need to feed the starter colony well, with sugar syrup and pollen substitute, to stimulate their brood rearing and royal jelly production.
- Move the cells to the finisher colony. The finisher colony is the one that completes the development of the queen cells. It should be a strong and populous colony, with a good queen, plenty of food, and enough space. You should move the cells to the finisher colony when they are about 24 hours old, and place them in a protected cage or frame, where the worker bees can continue to feed and cap them.
- Separate the queens. The queens will emerge from the cells about 10 days after grafting. You should separate them before they emerge, to prevent them from fighting or killing each other. You can use various methods to separate the queens, such as using queen cages, queen banks, mating nucs, or mini hives. You should also mark the queens with a color code or a number, to identify them and their age.
By mastering artificial queen rearing, you can produce as many queens as you need, and use them to multiply your colonies and increase your honey yield.
Colony Multiplication
The last essential skill for keeping Italian bees is colony multiplication. This is the process of splitting the existing colonies into smaller ones, and using the new queens to establish them. This way, you can expand your apiary and take advantage of the honey flow season.
Colony multiplication is the ultimate goal of mite control and artificial queen rearing, as it allows you to turn your small and weak colonies into large and productive ones. However, to do it effectively, you need to follow these principles:
- Choose the right time for colony multiplication. This depends on the nectar flow in your area, and the development of your colonies. You should aim to multiply your colonies when the nectar flow is about to start, so that they can grow and produce honey at the same time. If you multiply your colonies too early, they will decline and lose their foraging ability. If you multiply them too late, they will miss the nectar flow and have low honey yield.
- Adjust the comb spacing and add combs as needed. Whether you are multiplying your colonies or not, you should always keep the proper comb spacing in your hives, which is about one finger width. This helps the bees to maintain the temperature and humidity, and to work more efficiently. You should also add combs as needed, when the bees start to crowd the existing ones, or build burr combs on the frame bars. You should add the combs gradually, and place them near the brood nest, to encourage the bees to use them.
- Provide enough food sources. As the old saying goes, “pollen nurtures brood, honey builds combs”. You need to ensure that your colonies have enough pollen and honey, either from natural sources or from artificial feeding, to support their growth and development. You should also monitor the quality and safety of the food, and avoid any contamination or adulteration.
- Use the supering method to speed up colony multiplication. The supering method is a technique that uses a queen excluder to separate the hive into two parts: the lower part for brood rearing, and the upper part for honey storage. You can use this method to multiply your colonies by placing a new queen in the upper part, and letting her lay eggs and establish a new colony. Meanwhile, the old queen in the lower part will continue to lay eggs and produce honey. When the new colony is ready, you can separate it from the old one, and have two colonies instead of one.
By applying colony multiplication, you can increase the number of your hives and your honey production, and achieve your beekeeping goals.
Keeping Italian bees requires three essential skills: mite control, artificial queen rearing, and colony multiplication. By learning and practicing these skills, you can raise healthy and productive Italian bees, and enjoy the benefits of beekeeping. We hope this article has been helpful and informative for you, Thank you for reading!